Accessing your 123-Reg email via webmail is great, but when you need to access your emails on the go, you’ll have to set up your 123-Reg emails on your iPhone.
This is a step-by-step guide on how to set up your 123-Reg email accounts on your iPhone. Got an android phone? See our guide to setting up 123-reg emails on an Android device here.
The whole process is pretty straightforward and can be done in 10 simple steps. We have included the steps below along with screenshots, using an example email account “[email protected]”.
Steps to set up 123-reg emails on your iPhone
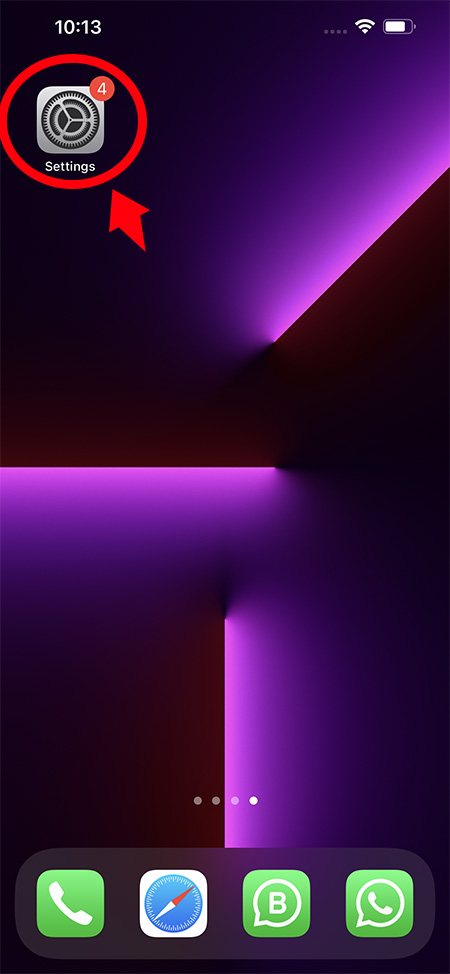
Step 1: Open the ‘Settings’ app
On your home screen navigate to the settings icon which is shaped like a gear cog.
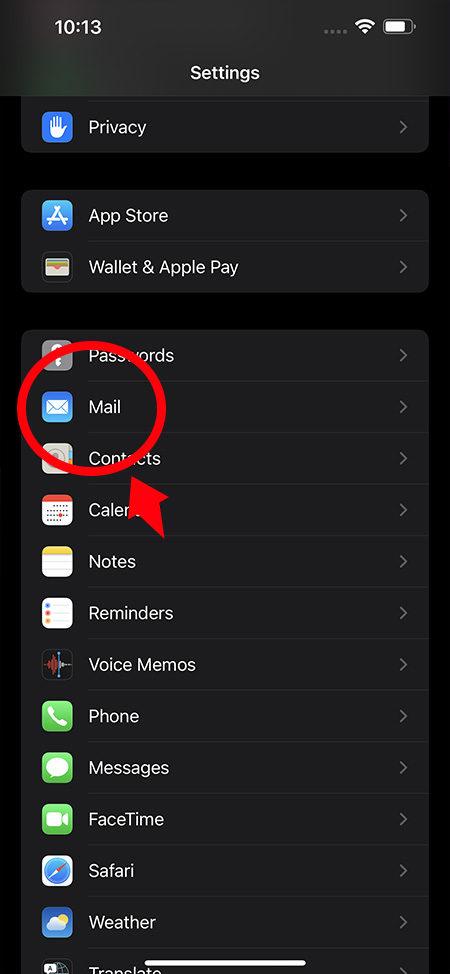
Step 2: Select ‘Mail’
Select ‘Mail’ which should have an icon of an envelope.
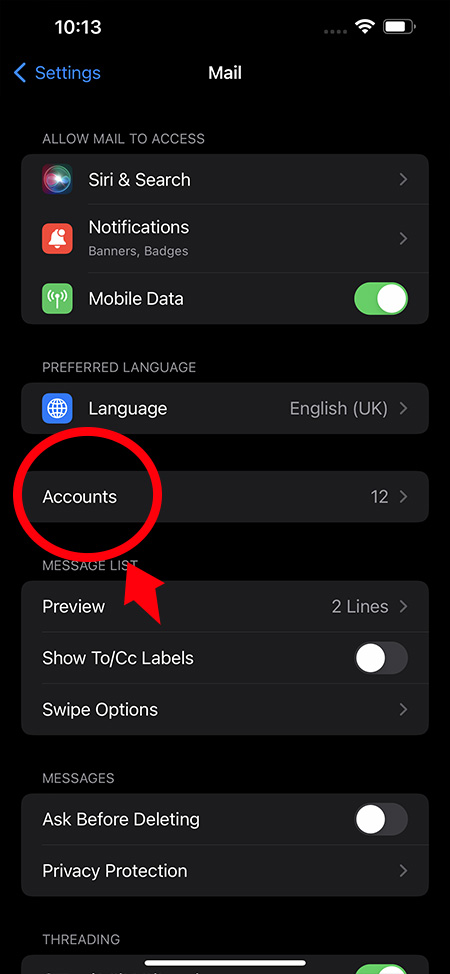
Step 3: Select ‘Accounts’
Select the ‘Accounts’ option. This is where you’ll setup the new account details.
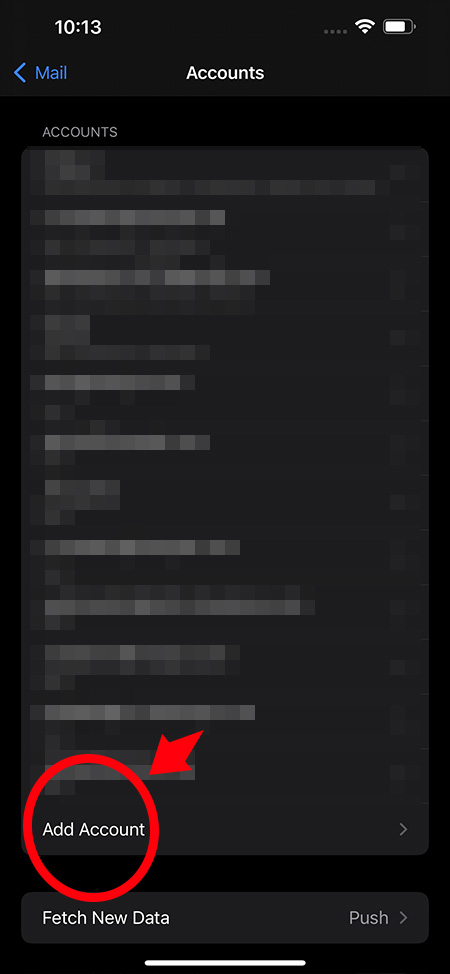
Step 4: Select ‘Add Account’
Here you want to select ‘Add Account’ to add a new account.
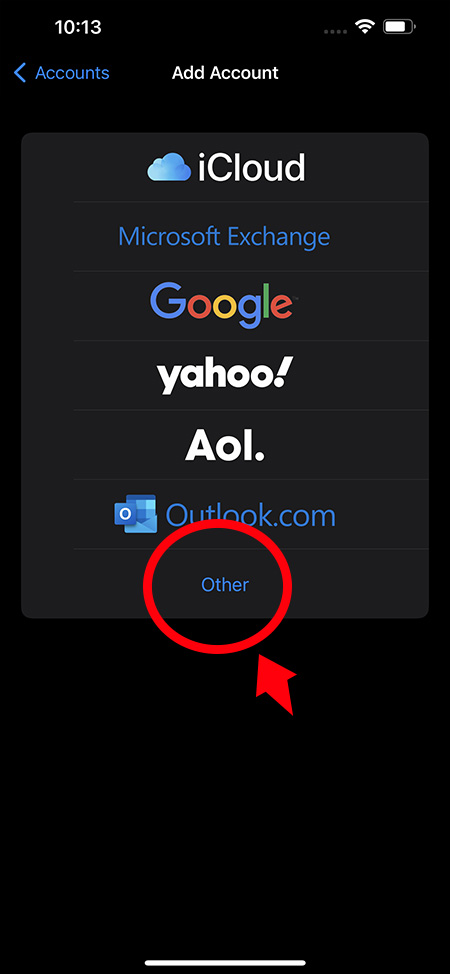
Step 5: Select ‘Other’
Here you want to select ‘Other’ as we will put in the account details manually.
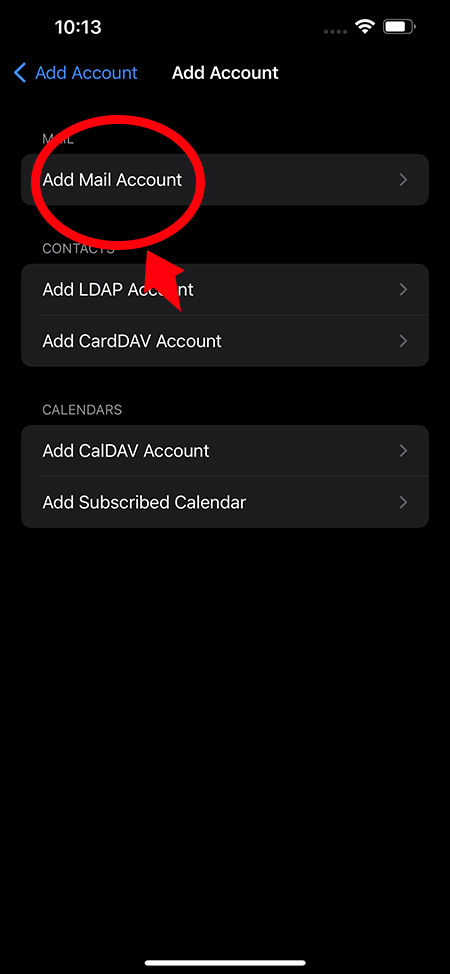
Step 6: Select ‘Add Mail Account’
Select the ‘Add Mail Account’ option to add a new account
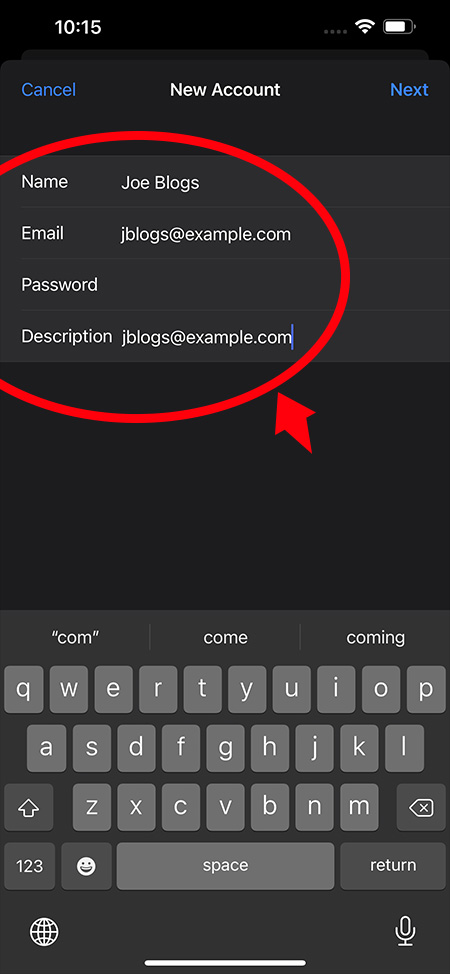
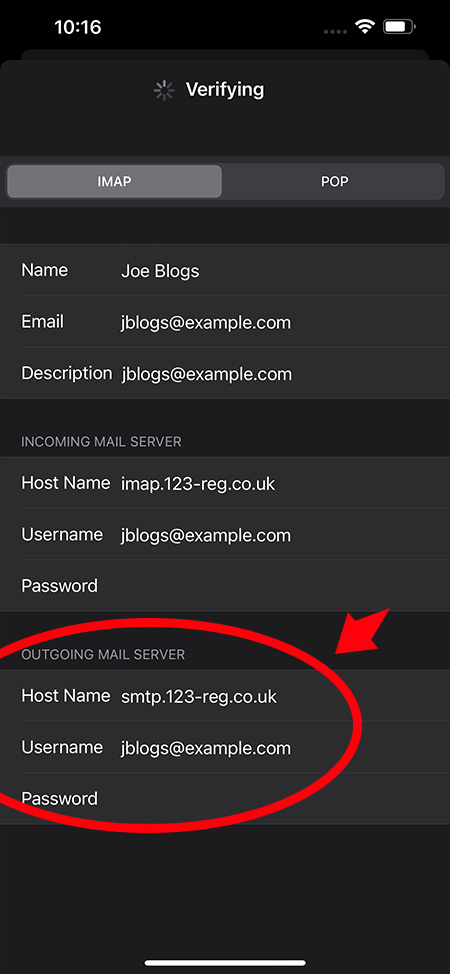
Step 7: Fill out ‘New Account’ details
In this step, you’ll need to enter the ‘Name’ which is the name you want to display as the sender when sending emails, e.g. ‘Joe Blogs’. Next fill in the ‘Email’ field with the email address we’re looking to set up (e.g. [email protected]). Next, put in the password that was provided to you for the account (contact your email administrator if you have not received this). Finally, enter a description for the account. In this example, we entered the email address as the description. Then select ‘Next’.
Step 8: Fill out the ‘incoming mail server’ details
Next, you’ll need to fill out the incoming mail server settings. Enter the ‘Host Name’ as imap.123-reg.co.uk, then enter the email address and password for the account you wish to set up.
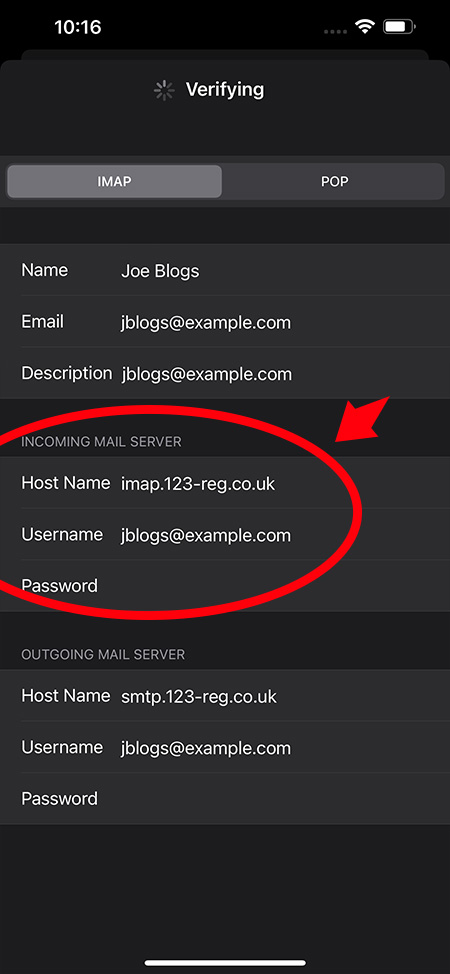
Step 9: Fill out the ‘outgoing mail server’ details
Next, you’ll need to fill out the outgoing mail server settings. Similar to the last step, however, this time enter the ‘Host Name’ as smtp.123-reg.co.uk, then enter the email address and password for the account you wish to set up, then click ‘Next’.
*Note: If you get any message pop-up, don’t worry this is normal, simply select ‘ignore security warnings’ to continue.
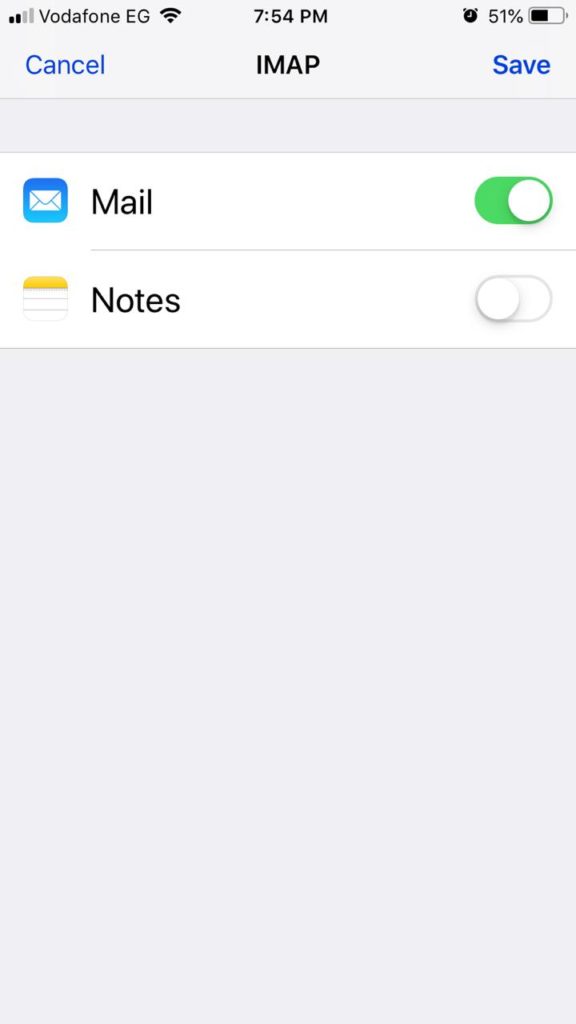
Step 10: Confirm & Save
If you have completed the last steps correctly, blue ticks should appear on the right-hand side of each field. Then you’ll have an option to set up notes with the account and click save.
And that’s it! you can now follow the same process to set up multiple accounts on your iPhone in just the same way. If you found this article helpful, or have some feedback, let us know in the comments below.

